Cuttlefish Bone Pewter Casting
Materials List
- One cuttlefish bone
- Wire, copper or steel around 1m length and about 1mm diameter
- Pliers/Wire cutters
- Flat Baseboard ( e.g. MDF ) to accommodate your cuttlefish bone
- Sealing Clay
- Stainless steel crucible ( e.g. measuring cup)
- Heat source ( hob, charcoal, etc.)
- Engraving tool ( e.g. awl, toothpick )
- Abrasive/Sandpaper ( 120 grit )
- Bowl
- Sand
- Heat proof gloves
- Selection of small files
- Hacksaw
- Sufficient lead free pewter for your casting
Flattening
Placing the abrasive on a flat hard surface, flatten one side of the cuttlefish bone so that you have a sufficiently large area to accommodate your design including, at least a 2cm border all round.
Engraving
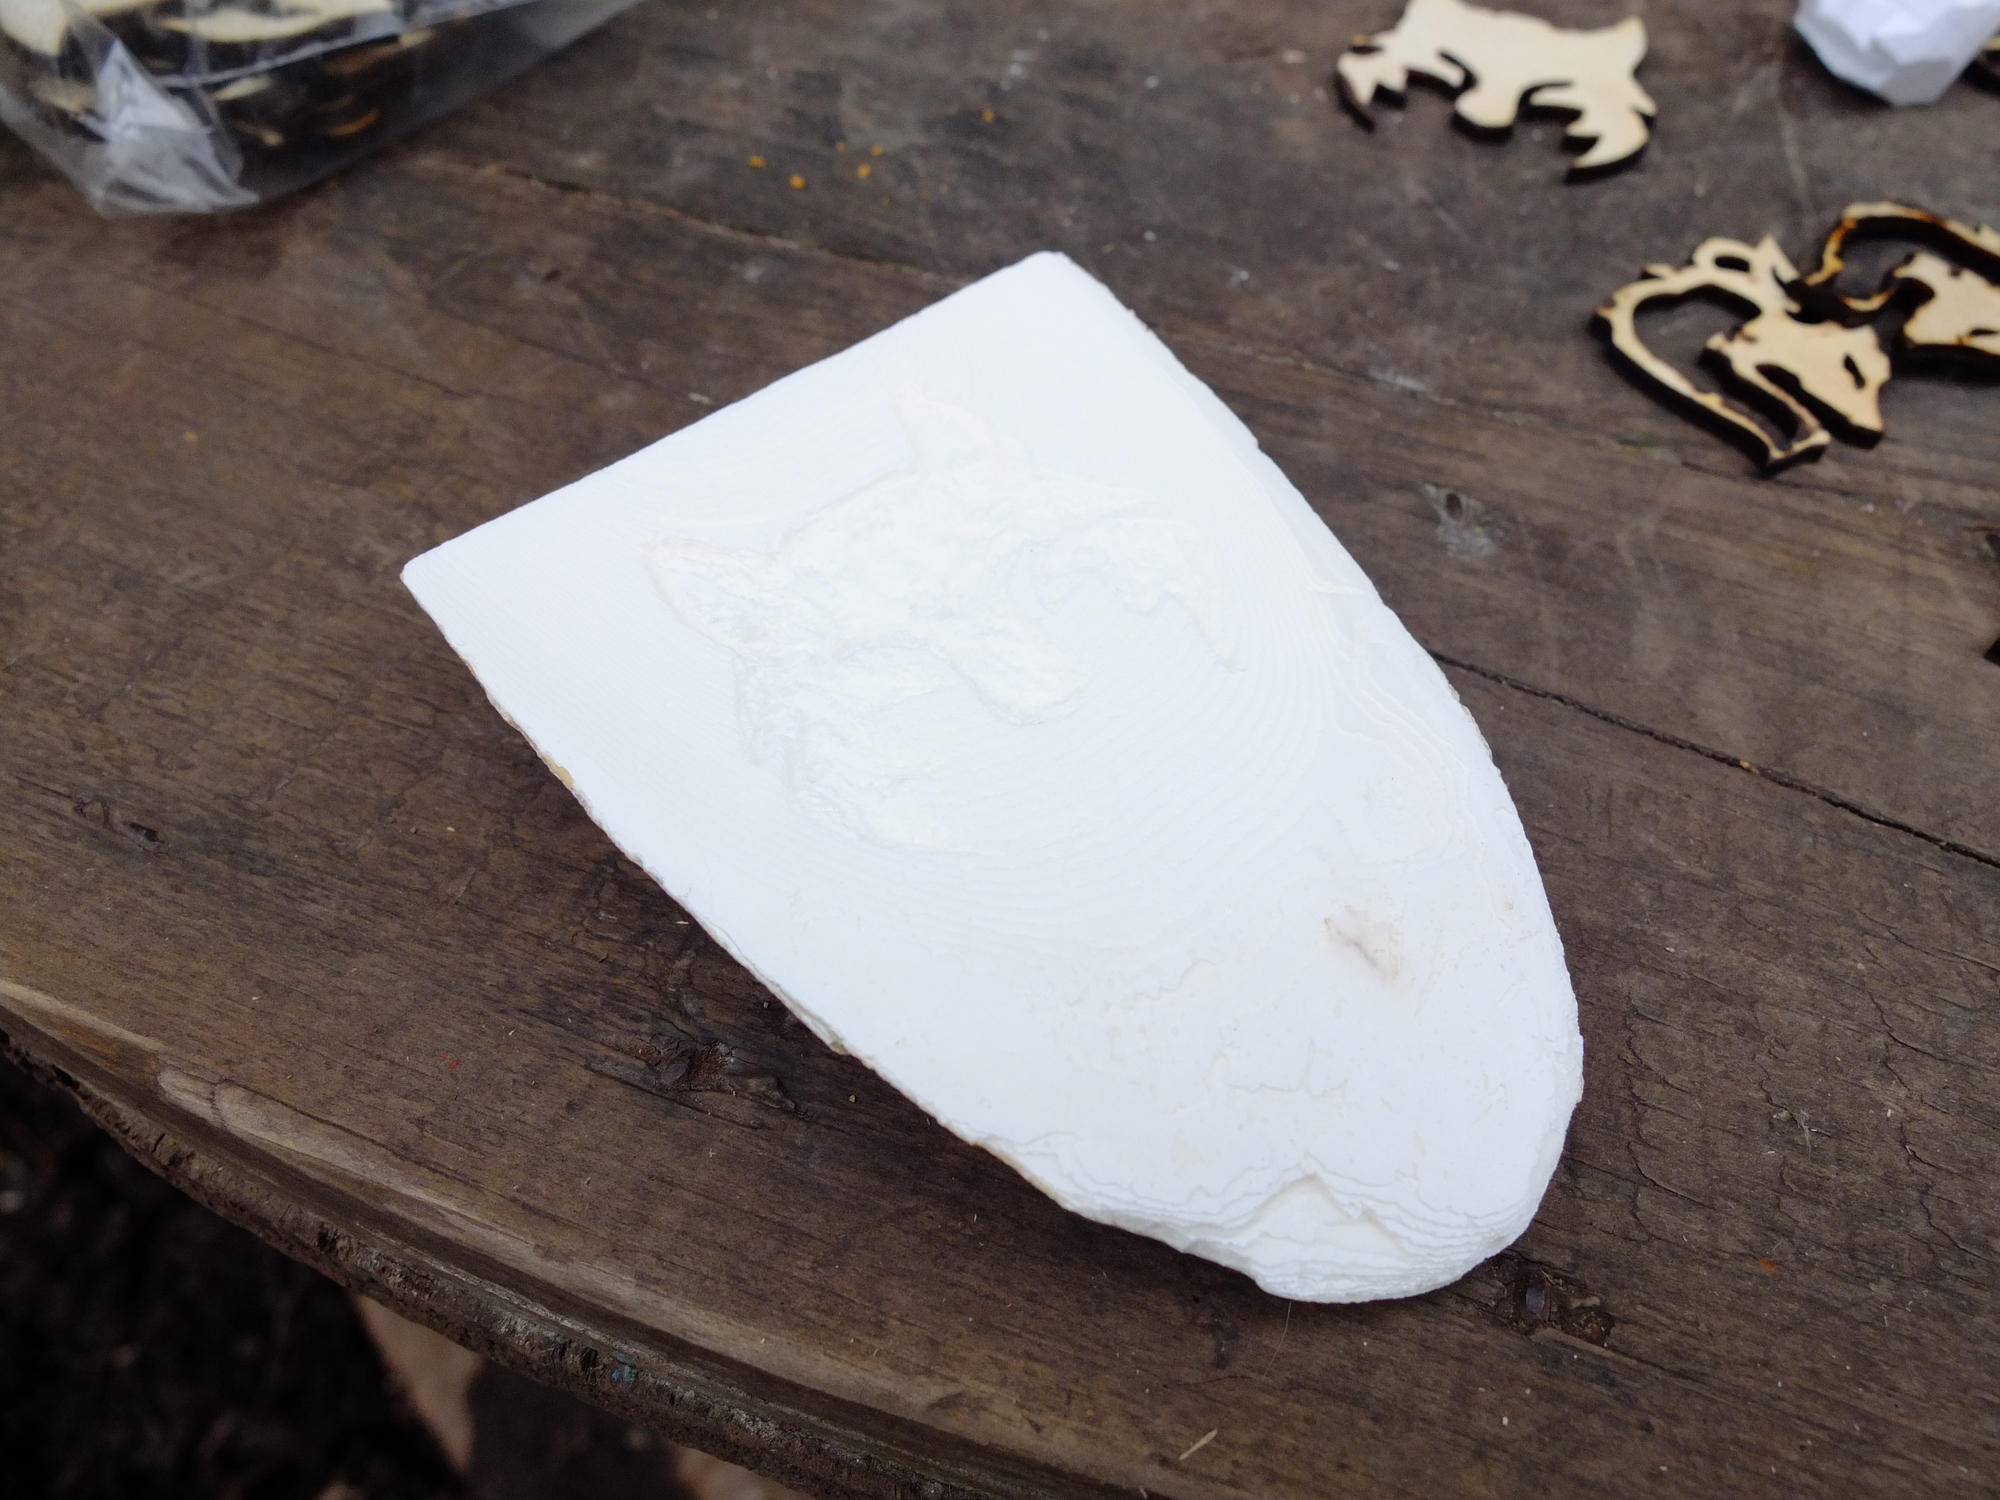
Using the engraving tool, carefully create a relief version of your intended piece. It may be useful to draw an outline of your casting on the cuttlefish bone before beginning this step. The material is very soft, so start gently until you get a feel for it. It is a good idea to decide which end will be the top of your mold. Keep in mind that the metal will need to flow from the top of your cuttlefish bone into casting, so you don’t want the relief carving to be too far down from the top, something like 40mm would be a good starting distance( sorry about the poor contrast ).
Add Funnel
Once you are happy with the relief carving, the next step is to make the funnel you will use to fill the casting with molten pewter. The funnel consists of two parts. A larger half conical area which the molten metal is poured into and a fill pipe which lets the metal flow into the relief casting. Both of these are also carved into the cuttlefish bone.
The top of the funnel should be something like 20mm in diameter, large enough to make it easy to pour in the metal when the time comes and about 20mm in height. This leads to the fill pipe, a channel to let the metal flow smoothly from the conical section to the relief carving itself. This should be a half pipe of around 3-4mm. Perhaps wider if you have a large casting.
Add Vents
Depending on the exact shape of your casting, there may be volumes of the mold which are dead ends and will be problematic for the molten pewter to flow into. You can ease this situation by creating small vent channels from the dead ends up to the top of the mold so that the air can escape. These channels need only be 1-2mm in size. If your first attempt at casting results in voids then think if blocked air might be the issue.
Wire to Baseboard

Once you have finished carving the relief mold, funnel and fill pipe and any vents, then you can mount the mold on the baseboard. Lay the flattened side of the cuttlefish bone on the board. It is a good idea to have the top of the funnel near the top edge of the board, as this makes pouring easier.
Tightly wrap the wire around the baseboard and cuttlefish bone, twisting the ends so that the wire clamps tightly around both items. Depending on how well you’ve got them fitted two or three wire wraps should be enough. The cuttlefish bone shouldn’t move when you try to dislodge it.
Seal Edges

Seal the edges of the cuttlefish bone to the baseboard using wet clay, leaving the funnel area clear.
Support Mold

To make it easier to fill the mold, it’s useful to have it supported in a vertical position. This can be done by placing the baseboard in a bowl filled with wet sand, a vice or some type of clamping system. Make sure you place the mold and stand
somewhere molten metal safe.
Heat Pewter
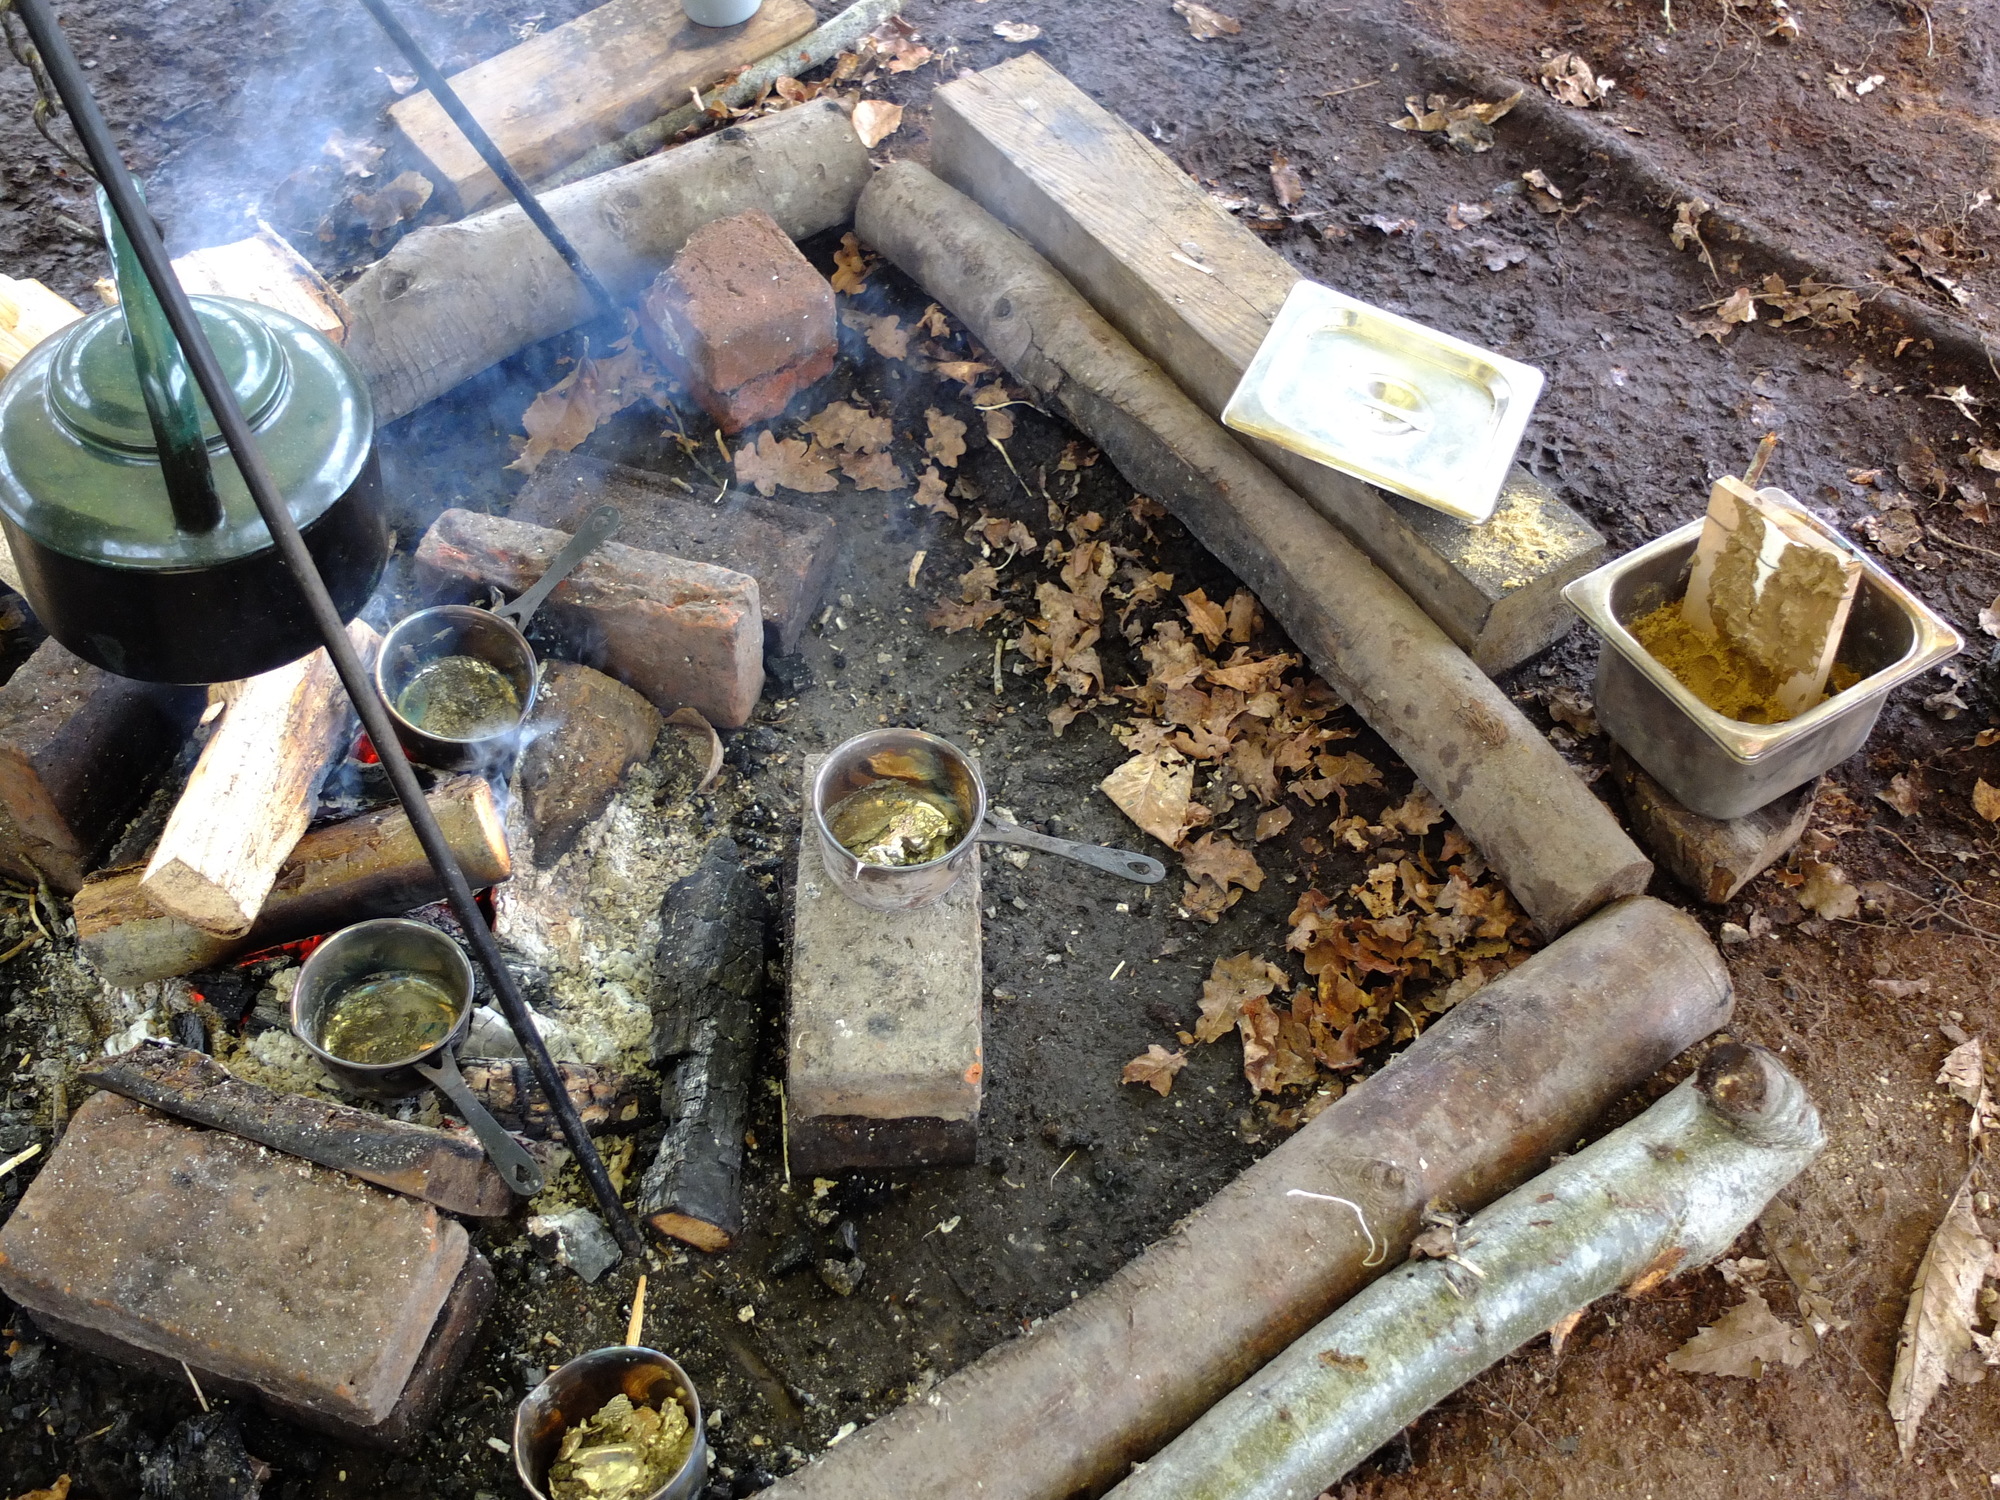
To work out how much metal you will need, estimate the volume of your relief carving, fill pipe and funnel. Then allow 7g of pewter per cubic centimetre and add an allowance of 20% or even more if your casting is small. Place the pewter into the stainless steel crucible. Using heat proof gloves place the crucible over your heat source and carefully allow the metal to heat and up melt, this should be at 230C or below.
Fill Mold
When fully molten, carefully pour the molten pewter into the funnel of your mold.If your calculations are correct there should be enough material to fill the casting and up into the funnel. Don’t take too long over this step as you don’t want any material to cool enough to stop flowing. So a positive smooth movement is best. If you find the metal backing up earlier than expected, check the size of the funnel, fill pipe and venting, modify if required if you think the flow has been restricted and try a second casting.
Remove Casting
Leave the casting to cool for 10 minutes. Remove the wires and sealing material.
Using gloves remove the cuttlefish bone form the baseboard, then gently ease the casting from cuttlefish bone. Gently pry it out starting from the funnel area, to void damaging your relief carving, if it doesn’t release at first.
Sprue Removal
Once the casting is cool enough to be handled you can then remove the sprue created from the funnel and fill pipe using the wire cutters/hacksaw/files as appropriate. Then proceed to cleaning up the casting with the files as required.
If you are lucky, you can re-use the mold several times, perhaps making small improvements to the design as you go.
Warning: This is the alpha version of this hackable and may contain some errors or omissions! If anyone has some bug fixes or upgrades please let me know!
 (Please do not attempt to flatten one side of a cuttlefish, it probably won’t enjoy it)